The Windows 11 operating system allows users to customize the colors and customize the Start menu by moving and removing certain items and adding new tools to the menu. It allows to customize the screen resolution, and there are many customization options that users can set to their preference. Below we will explain how to customize Start Menu and others in Windows 11:
How to Customize Start Menu:
By default, the Start Menu in Windows 11 displays three rows of app icons at the top, your last opened files below, and a power button icon to the right of your account picture and name.
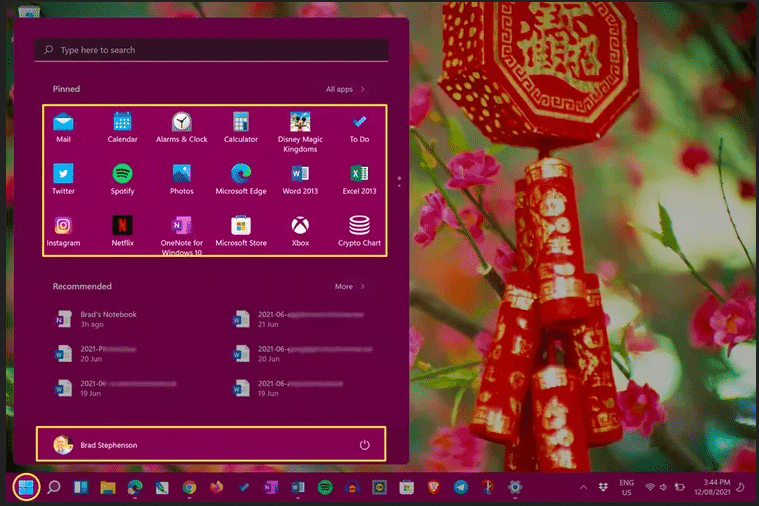
You can customize the Start menu by moving and removing certain items and adding new tools to the menu.
1- To change the location of an app icon in the start menu, click and drag the icon to where you want it.
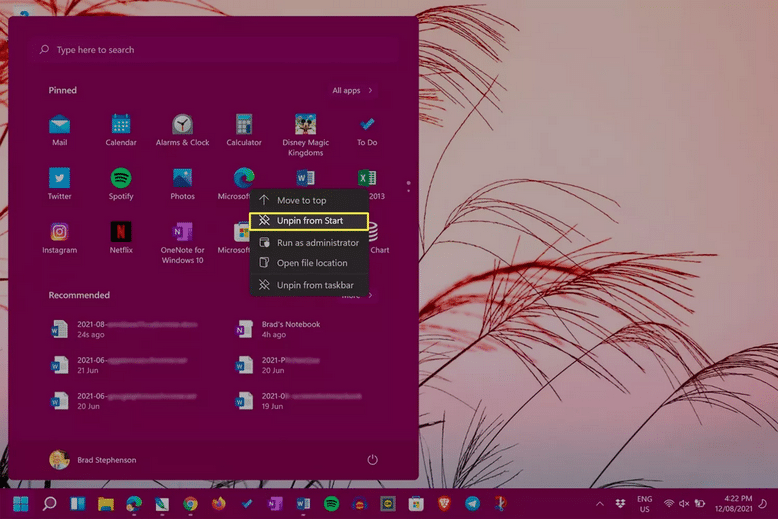
2- To remove an app icon from start menu, right-click or long-press on the app icon and select (Remove from Start). Doing so will remove the app’s icon from the list. It will not uninstall the app.
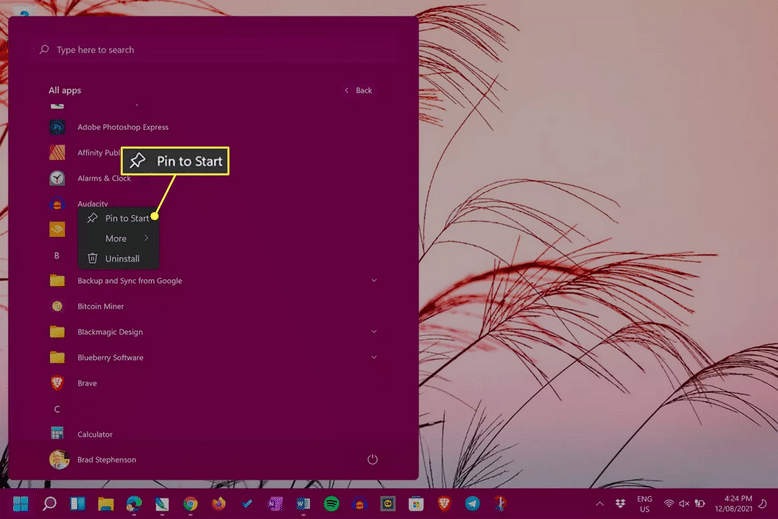
3- To add an app icon to the Start menu, click the All Apps button in the top right corner, click the app icon, and then select the Start option.
4- To hide recently used files from start menu, you can follow these steps:
- (Settings) Go to Settings.
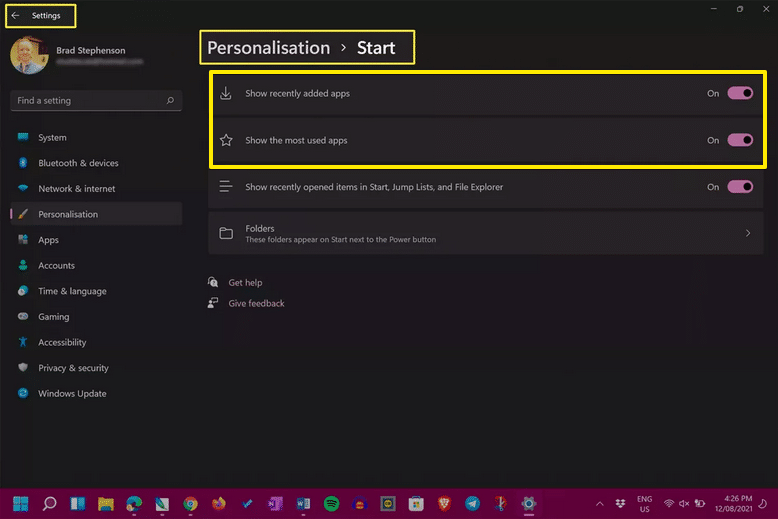
- Click on the Personalization option and then select Start.
- Disable the option (Show recently opened items in Start, tab lists, and file explorer) by pressing the toggle button next to it.
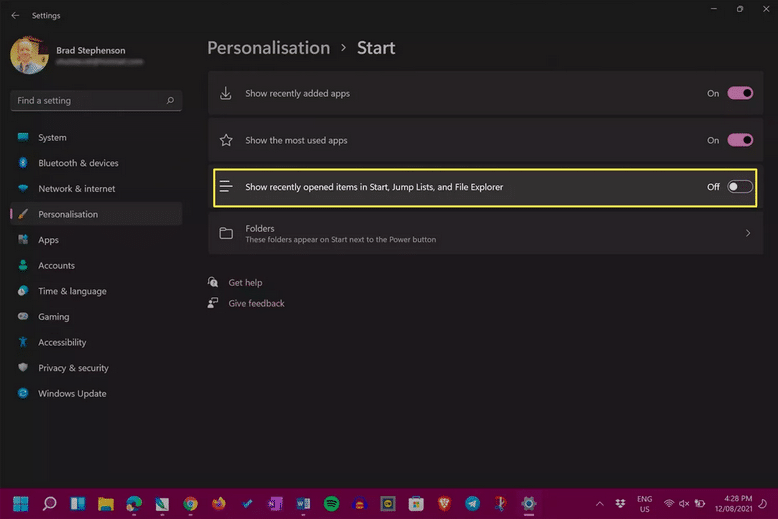
5- Press the toggle buttons next to the Show recently added apps and Show most used apps option to remove new and used apps from the recommended section of the Start menu.
6- To change the color of the start menu in Windows 11, you can follow these steps:
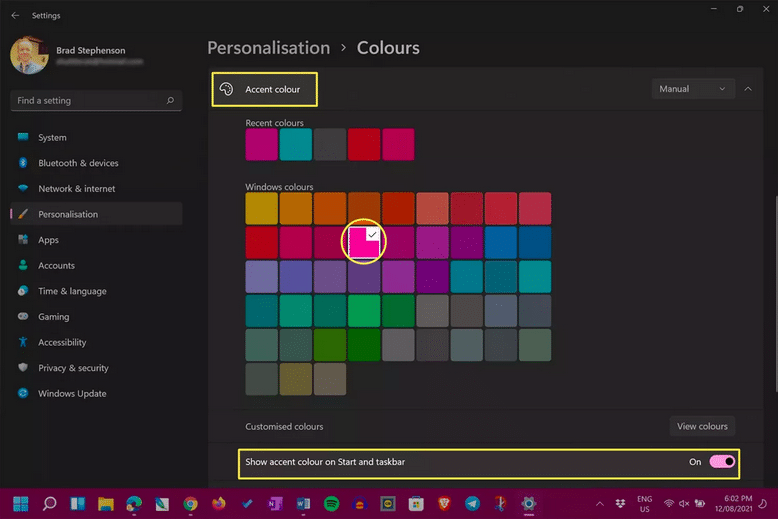
- (Settings) Go to Settings.
- Click on Personalization option.
- Click on the Colors option and select a color from the options available under the Accent Colors tab.
Other options for customizing Windows 11:
Like the Start menu, many features of Windows 11 can be customized, including:
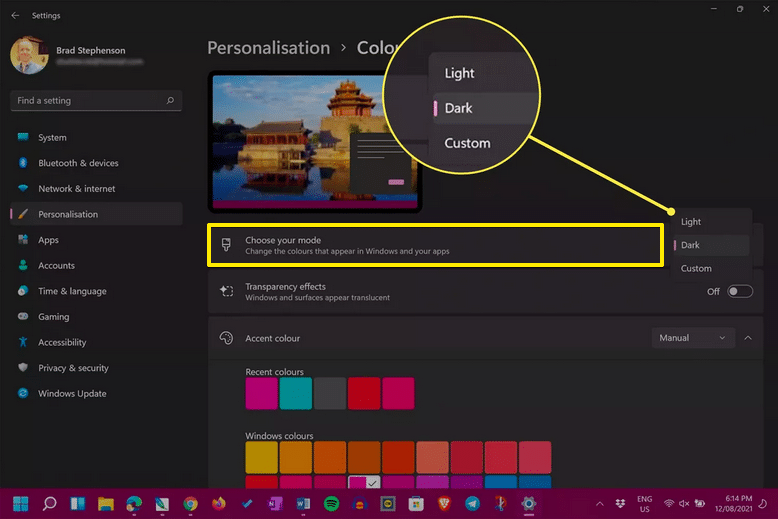
1- To switch to dark or light mode, open Settings, click Personalization, then select Colors.
From the (Choose your mode) menu, select a (dark) or (light) mode. Tap Custom to use one mode for the operating system and another mode for apps.
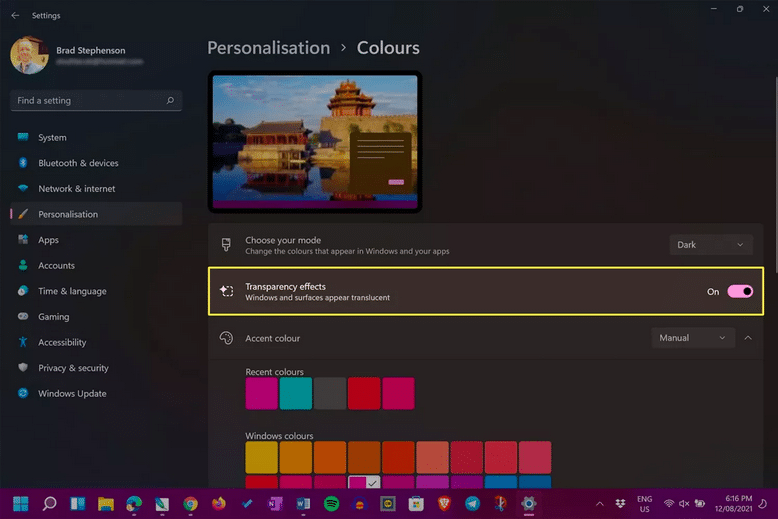
2- To add transparency effects to application windows, menus and other parts of the operating system, you can follow these steps:
- Open Settings.
- Click Personalization and select colors. And enable the button that appears next to the option (Transparency Effects) Transparency Effects.
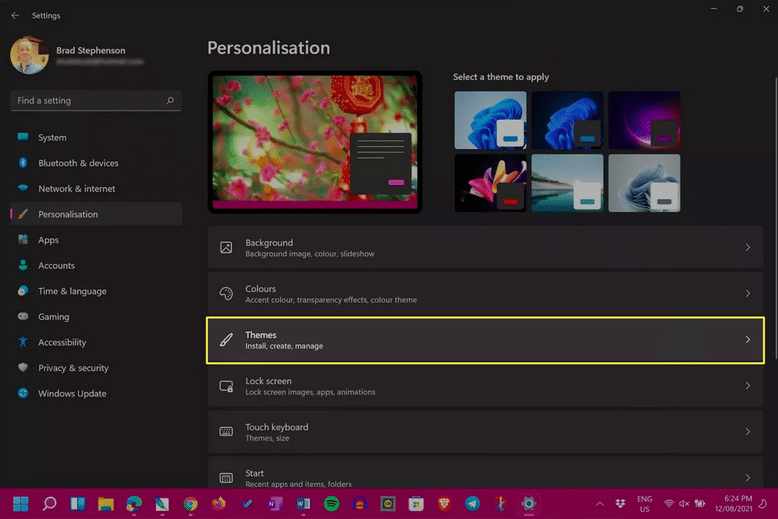
3- You can choose one of the available themes to customize the general appearance of the operating system. It is a collection of background images and color schemes. Selecting one of them will change the appearance of different features of Windows 11 at once. To do this, follow these steps:
- Open Settings, click on Personalization, and select Themes.
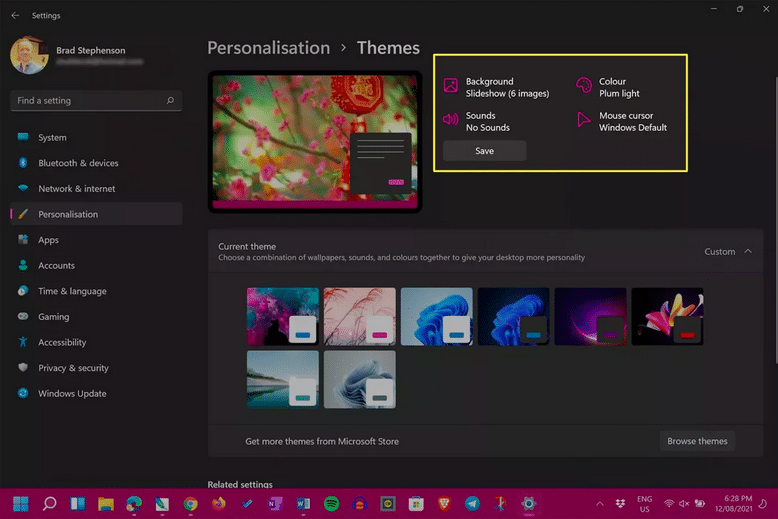
- At the top of the screen, you can manually set the appearance, such as choosing a new background image, cursor shape, and sounds.
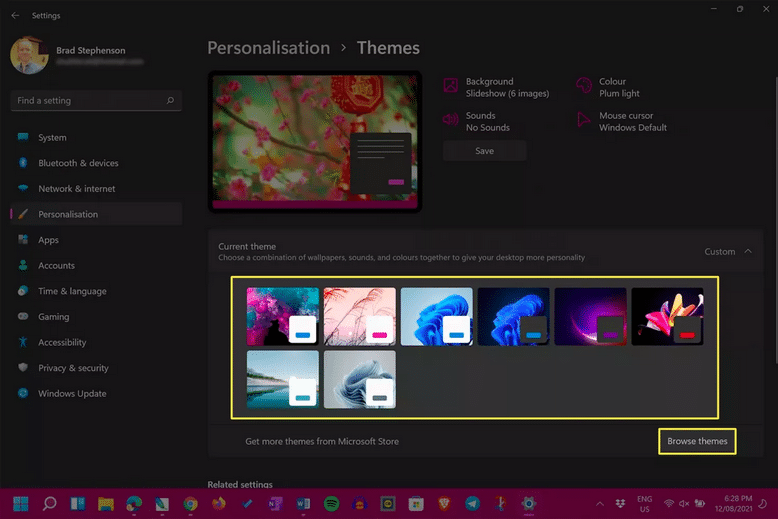
- At the bottom of the screen, you can choose from other themes already added or download new ones by clicking the Browse Themes button.
How to Customize Screen Resolution in Windows 11:
To adjust the screen resolution in Windows 11, right-click on the desktop and click Display Settings, then choose Size and Layout, then click Display Resolution and select the resolution you want.


